How to Assign a Test to User(s) through a Master Group
This Guide explains how to assign a test to a user through the Master Group. You will need to have the “Assign Tests” permission to complete this guide.
Note: This function is separate from claiming a test to enter data individually and is intended for assignments to other users or for assigning in bulk. To claim a test outside of this feature for yourself, please refer to the "How to Claim a Test for Data Entry" guide.
[View PDF version of this Guide]
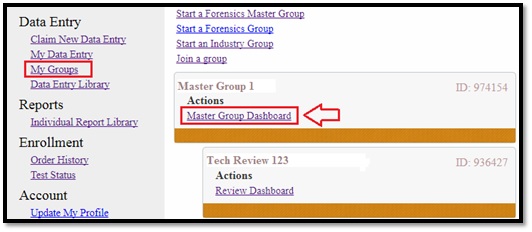
Click on "My Groups", on the left hand side under “Data Entry”. Click on "Master Group Dashboard" under the Master Group.
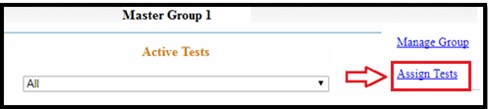
Click on "Assign Tests" on the right hand side of the Master Group Dashboard.
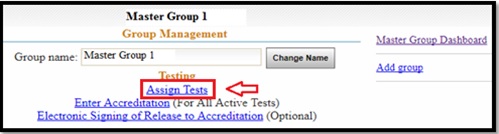
Alternatively, the Assign Tests feature can be accessed through the Group Management page.
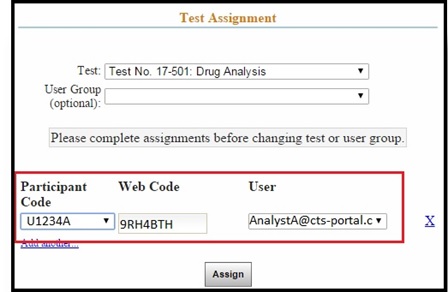
The Test Assignment page will open. Choose the proper test from the drop down list.
You have the option of choosing a user group, which will limit your available users to the members of the selected group. To use this feature, use the drop down list to choose the correct user group.
Note: Only one test can be selected from the drop down box on the top of the page to be assigned to users at a time.
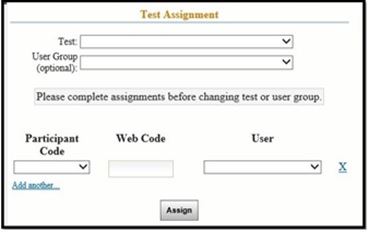
If you have permission to access the preloaded codes for your Lab Account, choose the Participant Code from the drop down list and the Web Code will fill in automatically. If you do not have access to the preloaded codes, enter the Participant Code and Web Code provided on the hard-copy data sheets or in the Excel attachment for digital download tests. Then choose the correct user from the drop down list.
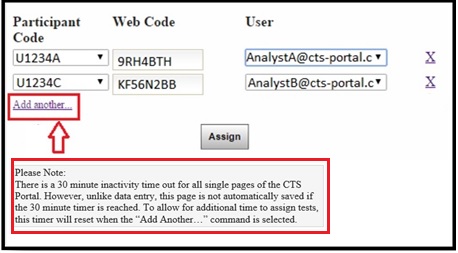
If additional tests are to be assigned, click on "Add another" located under the Participant code. An additional row will appear and can be completed as above. Continue this process until all necessary tests have been assigned.
Note: This section of the Portal does not have an automatic save feature and will timeout after 30 minutes of inactivity. To allow for additional time to assign tests, this timer will reset when the “Add another…” command is selected.
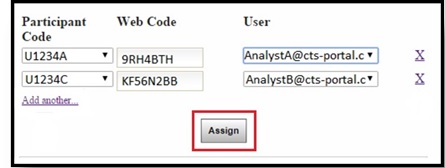
If you need to delete a row, click on the X to the right of the row. This will automatically delete the row.
Once all tests have been added, click on the "Assign" button.
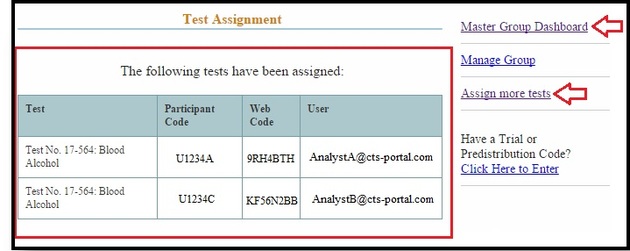
A message will appear with a list of all assigned tests. Click on "Master Group Dashboard" to see all the active tests or click on "Assign more tests" if you need to assign additional tests.
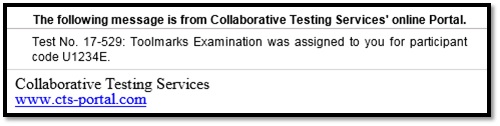
The tests will now be available within each user’s My Data Entry page under their Active Data Entry section, and each user will be sent an e-mailed notification of the assignment of the test.