How to Review a Test and Perform Post Review Actions
This guide walks you through how to review a test that has been submitted for review. It also explains the post review actions you can perform with the test, such as submitting it to another group or CTS.
[View PDF version of this Guide]
Find Test for Review
Click on “My Groups”, then click on the “Review Dashboard” under the forensics group you would like to access.

Claim Tests
Under the Tests Up for Review header, there will be a list of all tests to be reviewed.
If you do not see the sections "Tests I'm Reviewing" and "Tests Up for Review," you have not been given the permission to claim tests for review. Contact your Group Manager to have this corrected.
Click on "Claim" next to the test you are reviewing. This will move the test up to the “Tests I'm Reviewing” section.

Reviewer Actions
The Actions section will now show all actions available to a Reviewer.

Overview of Reviewer Actions
- Unclaim – releases a test that was incorrectly claimed so that the appropriate reviewer may claim it.
- Open - allows reviewer to open a Read Only version of the test to perform onscreen review.
- View Notifications – allows reviewer to see all notifications specific to this test.
- E-mail PDF - allows reviewer to request a PDF of the test results for offline review.
- Post Review Actions – opens a new section of the review panel that contains all options a reviewer has after the review has been completed.
Open
A read only version of the test will open. Click on each tab to review the separate pages. Note: No changes can be made to the test. You are only reviewing.
Click "back" once you are finished reviewing.

View Notifications
A new page will open that lists all notifications related to the test. This includes when it was forwarded to the review groups, and who claimed it for review.

E-mail PDF
A new page will open that allows you to send a PDF version of the selected test to one or more e-mail addresses for offline review or documentation needs.
Note: This is NOT a submission of your data to CTS.

Post Review Actions
You will be taken to the following page that has several actions that can be performed. A description of each of the actions is listed below.

Return to Original User:
When returning the test to the original user, an optional comment can be entered in the provided box. Once any necessary comment has been typed into the text box, click on the "Return to User as Incomplete" or "Return to User as Complete" buttons to return the test to the original user with the selected notation of incomplete or complete.
The original user will receive an e-mailed notification of this action and the test will be removed from your "Tests I'm Reviewing" section of the Review Dashboard.

Submit to another group:
If you would like to submit the test to another group for review or final test submission, choose the correct group from the drop down list. Then click on the "Send" button. You can also submit the test to the same group for another reviewer to claim.
The original user will receive an e-mailed notification of this action and the test will be removed from your "Tests I'm Reviewing" section of the Review Dashboard.

Submit to CTS and/or Fill out or View Accreditation Information:
If the test is complete and you would like to submit the test to CTS, click on the "Continue to Final Submission" button. Also click this button if you would like to view or fill out the accreditation information only.

The Accreditation Release page of the test will open.
If you see "This view is READ-ONLY" in the upper left hand corner, it means you do not have permission to fill out the accreditation information. If the information has not been filled out and you do not have permission to fill out the accreditation information, click the "Save & Close" button and inform the necessary person.

If the information has already been filled out you can proceed to the CTS submission instructions below.
If the information has not been filled out and you do have permission to fill out the accreditation information, click on the circle next to the appropriate response.

If you click on the circle next to the first response, the bottom section will appear. Fill in the information into the bottom section.

Once you have filled out the accreditation information, you can either click on "Save and Close" to close this window and perform another post review action, like forwarding to another group, or return to the user. You can also submit the test to CTS by clicking on the "Submit to CTS" button to send the test to CTS.
Note: If the Submit to CTS button does not appear, you do not have permission to submit the test to CTS. Contact the appropriate Group Manager to have this resolved.

A confirmation screen will appear. Click on the "Yes" button to confirm that you would like to send the test to CTS.

A message confirming that the test has been submitted will appear. You can return to your My Data Entry section of the portal through the “tests” link or return to the Group Dashboard through the “group dashboard” link.

The Original User will receive two e-mailed notifications that their test has been submitted to CTS. The first states that the Group submitted the test to CTS.

The second is a submission confirmation e-mail along with a PDF copy of the submission.
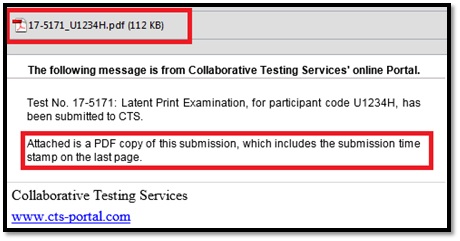
The PDF will include a submission time stamp on the last page.
