How to Complete Data Entry
This guide walks you through navigating the test response form and completing data entry.
[View PDF version of this Guide]
Note: The images shown below are for illustration purposes only. Your test may differ in content, number of pages, number of tabs, and names of tabs.
Navigate through the test response form by clicking the appropriate tab or using the previous and next links at the bottom of the page.
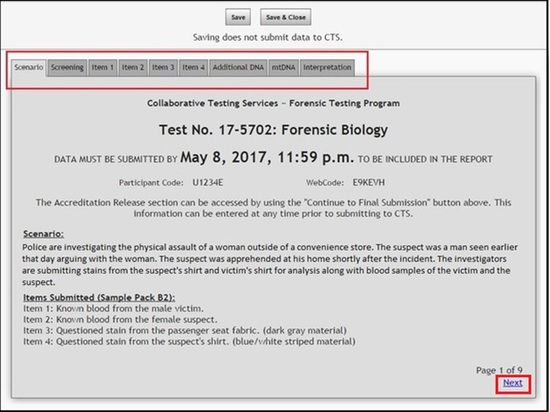
The following action buttons are found on the top of the page:
- "Save" - saves your test as you progress through it.
- "Save & Close" - saves and closes the test for you to continue it later.
- "Forward to a Group" - submits your test to a Group for review. Note: This button will not appear if you do not belong to a group or if you do not have permission to forward to a group.
- "Continue to Final Submission" - access final submission steps which include the Accreditation Release Form and confirmation of submission to CTS. Note: This button will not appear if you do not have submission permissions.
Below are examples of the top of the page depending on whether you belong to a group or not and what your permissions are for the group.


Note: Make sure you click on "Save" periodically. As a security feature, if you have not clicked on "Save" in over 25 minutes, a countdown clock will appear on top of your screen indicating that you have a few minutes to click on "Save". If you do not, your test will be auto saved and you will be automatically logged off.

Read each page thoroughly and fill in all questions as applicable to your testing.
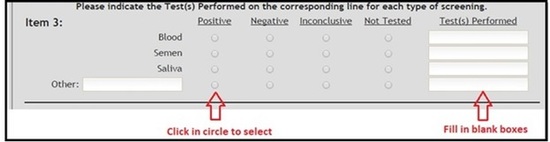
In places where a circle appears next to different choices, click on the appropriate circle. A dot in the center of the circle will appear in the selected circles. Only one circle can be chosen for each grouping of responses, clicking on a different response will move the dot. This style of response section does not allow you to fully remove a response dot.
In places where there is a box, fill in the appropriate response in the box.
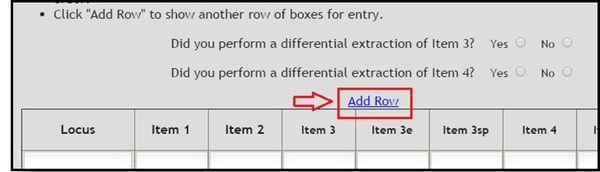
On certain pages, there is an "Add Row" command, which will allow you to add additional rows as needed.
After you complete a page, click on the next tab to move to the next page.

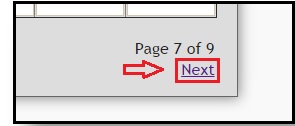
Alternatively, you can move to the next page by clicking "Next" on the bottom right hand corner of each page. Note: Changing pages/tabs does not automatically save data.
Continue throughout the test until completed.
If you would like to continue entry for the test later, click on "Save and Close" at the top of the page.
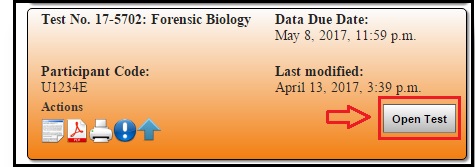
Your test will appear listed under Active Data Entry, to resume your test, click on "Open Test".
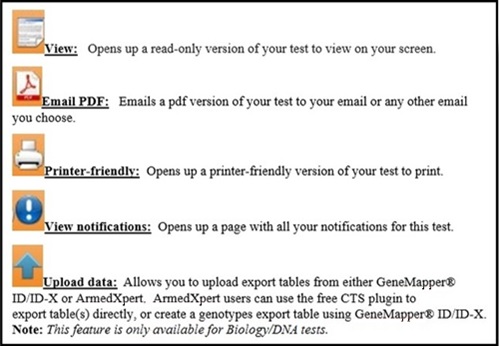
You can perform several other actions. A description of each action button is listed below.