How to Set Permissions for Forensics Master Group Members
This guide explains how to assign user's permissions by a Master Group. This can only be done by a Group Manager.
[View PDF version of this Guide]
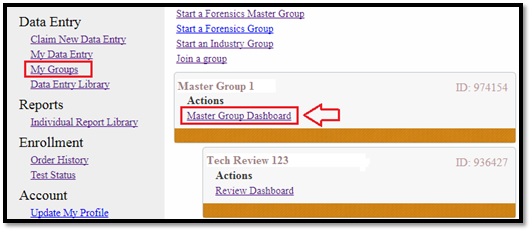
Click on "My Groups", on the left hand side under “Data Entry”. Click on "Master Group Dashboard" under the Master Group.
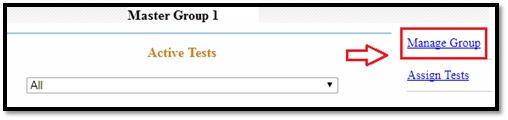
Click on "Manage Group" located on the right hand side of the Master Group Dashboard.
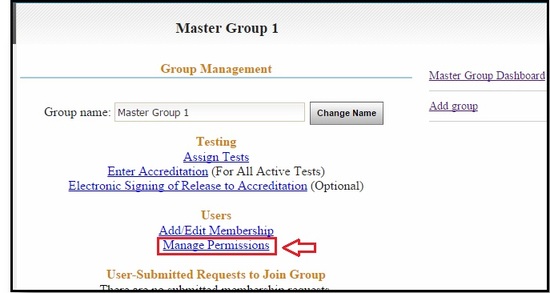
Click on "Manage Permissions" located under the Users Section of the Group Management page.
The Permission Management page will open, displaying all users of the Master Group and sub-groups. Users with manager permissions are under the "Group Managers" section. The remainder of the users are listed under the "Group Users" section.
All boxes with a check mark indicate that the user has permission for that activity.
Click on a box to either add a check mark or remove a check mark. Once all permissions are set, click on one of the "Apply" buttons
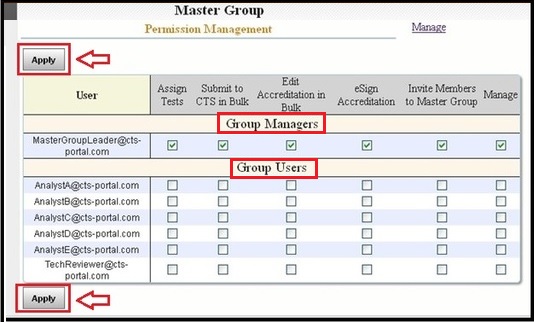
Actions available by setting permissions:
- Assign Tests - allows user to assign tests to any users who are members of the sub-groups.
- Submit to CTS in Bulk - allows user to submit tests to CTS through the Master Group Dashboard.
- Edit Accreditation in Bulk – allows user to edit accreditation through the Master Group Dashboard.
- eSign Accreditation - allows user to complete the steps for electronic signature of their accreditation submission. This is an optional step.
- Invite Members to Master Group - allows user to add other users to the Master Group and send invitation e-mails to them.
- Manage - allows user to set Master Group permissions.
Note: The user who started a Master Group is automatically set as Group Manager. This user has all the permissions. Users within a Master Group receive no permissions by default. Access to all permissions must be specifically turned on by the Group Manager.