How to Upload DNA Data into Your Test
This guide explains how to upload allelic data into many of CTS’ DNA Proficiency Tests.
[View PDF version of this Guide]
Note: Uploading data through this process will override any data already entered in the applicable test section.
Once the test is claimed, it will appear in the “My Data Entry” section. Click on the blue arrow icon under “Actions” and the "Upload data" page will open.

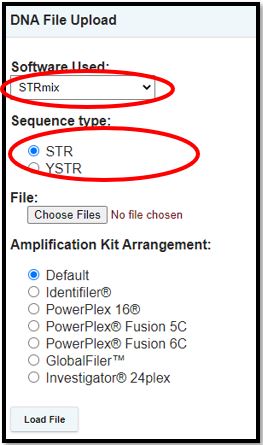
First, choose the “Software used” and “Sequence type” for the data being uploaded.
Note: Ensure your data has been exported correctly depending on the software used. For uploading data via GeneMapper® ID/ID-X, additional instructions will appear on the bottom of the page. For STRMix, ensure the data from the software has been exported as a .txt file. Versions 2.4, 2.5, and 2.6 are currently supported. For TrueAllele, ensure the data from the software has been exported as a .csv file.
Next, click on the “Choose Files” button to locate the file to upload and select a kit from the “Amplification Kit Arrangement.” This amplification kit will control the loci order. Multiple files may be chosen at once. (Supports ArmedXpert, GeneMapper® ID/ID-X, STRMix, and TrueAllele files).
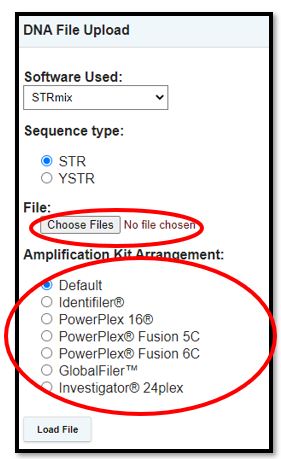
Locate the file under the appropriate folder. Click on the file containing the data to be uploaded, then click “Open.”
After the file has been chosen, click on the “Load File” button on the bottom of the screen.
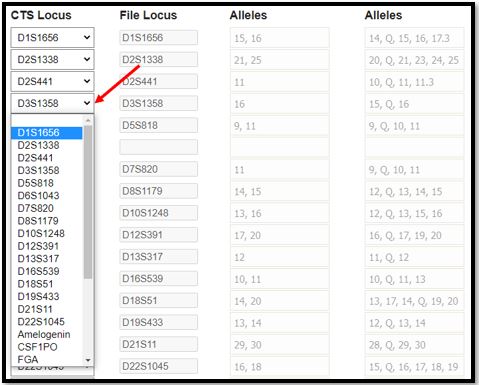
Select the appropriate file for each item number on the top of the screen. Click the arrow to open the drop-down list above each necessary item number. You can select a file for all necessary items in your test at once.

Once chosen, all alleles will appear for each locus.
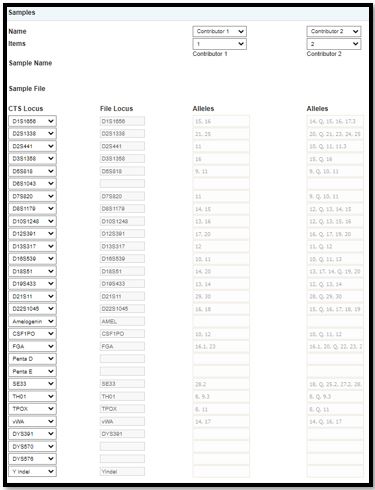
Ensure to review this data. If the “CTS Locus” does not match the “File Locus,” click the arrow next to the “CTS Locus” to choose the correct locus.
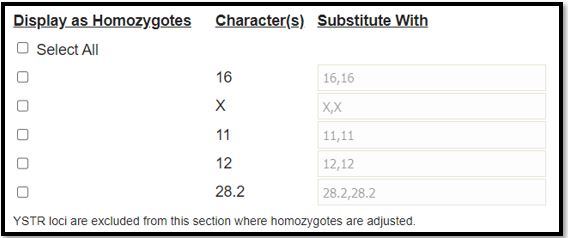
Next, review the “Substitution Options” at the bottom of the screen. This section allows you to substitute a character or blank space with something else.
![]()
In this section, you can also choose how to display homozygous alleles. By default, a homozygous allele will be represented by a single allele (i.e., “8”). Click on the box next to any character if you would like the homozygous allele to be shown as the two identical alleles (i.e., “8,8”).
Once this section is complete, click the “Next” button at the bottom, right hand area of the screen.
The next window will show all changes to the data based on your chosen options for a final review. Click on the “Save” button to successfully transfer this data into the test.

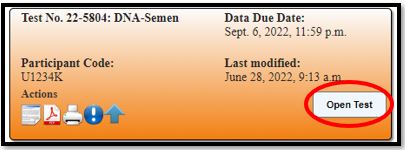
Your files have now been uploaded to the test! You will be sent back to the “My Data Entry” page. Click on the “Open Test” button to review the data that has been uploaded.
Appendix A
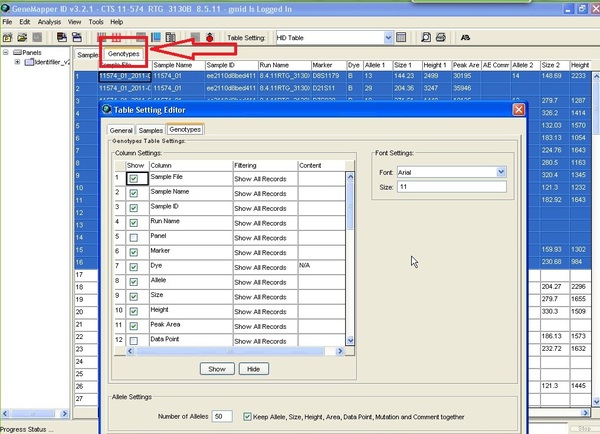
[ArmedXpert users can use the free CTS plugin to export table(s) directly, or create a genotypes export table using GeneMapper® ID/ID-X]
- Select an existing table setting or create a new table as described below.
- Click on the genotypes tab in GMID before selecting File > Export (Ctrl+E)
- The genotypes file generally has tab delimited columns such as: Sample File, Sample Name, Marker Allele 1, Size 1, Height 1, Allele 2, Size 2, Height 2, etc.
- "Sample File" and/or "Sample Name" columns are required in order to upload the STR genotypes.
- The "Marker" column is required.
- The "Allele" columns have to exist (at least one). The Allele column title format should look like this "Allele#" or "Allele #".
- Any additional columns, such as "Size" and "Height", are unnecessary, but will not affect the upload.
Note: The file needs to be exported as a text file.